Baked Falafel!

Standard

Image

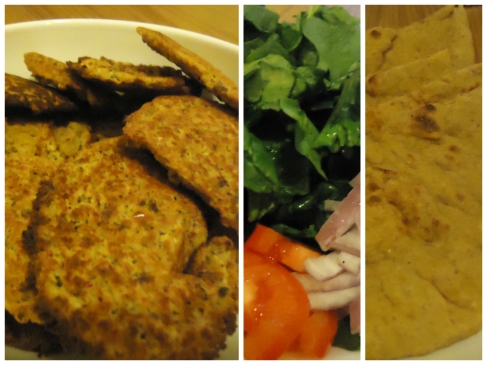
I love falafel. But I don’t love the heavy, bloated feeling of having eaten a lot of fried food. Solution? Baked falafel! My boyfriend and I modified a recipe from The Picky Eater. It was easy and a good template, though I think in future I’ll make some modifications. But first, the recipe:

The Ingredients – Falafel

  • Whole-wheat pitas
  • One 15-oz. can chickpeas, well drained
  • 1 red onion, roughly chopped
  • 1/4 cup panko breadcrumbs
  • 3 tbsp. finely chopped fresh parsley
  • 1 1/2 tbsp. chopped garlic
  • 1 tbsp. chopped fresh cilantro
  • 1/2 tbsp. ground cumin
  • 3/4 tsp. salt
  • 1/2 tsp. baking powder
  • 1/4 tsp. lemon juice
  • red pepper flakes, to taste
  • black pepper, to taste
  • Pam/nonstick spray
  • Spinach (toppings – not to be included in the falafel mixture)
  • Diced tomatoes (toppings – not to be included in the falafel mixture)

Directions

  • Preheat oven to 375 degrees. Place all ingredients for falafel (except for the pitas, baking powder, and nonstick spray) in a food processor, and give them a good chop.
  • Transfer into a bowl, add the baking powder and stir together.
  • Spray a baking sheet thoroughly with nonstick spray. One at a time, take spoonfuls of mixture in your hands and form 15 balls, each about the size of a ping pong ball, and place them on the baking sheet.
  • Bake in the oven for 15 minutes.
  • While your falafel patties are baking, chop your veggies and warm up your pita bread over the gas stove.
  • Remove baking sheet from the oven, and carefully turn each ball over, gently reshaping if the bottoms have flattened.
  • Return to the oven and bake for an additional 10 – 15 minutes, until golden brown and slightly crispy.
  • Cut the whole pitas into halves, fill with spinach, falafel balls, diced tomato, and diced tomato.
  • Nom.

My partner’s not a big fan of sauce, so we just spread hummus on our pita instead. We used roasted red chili hummus because we like our food a little spicy, but I’m sure anything would be delicious. Picky Eater recommends getting hummus and watering it down a little, if you want a sauce.

If I do this again I’ll cut way down on the parsley and lemon, as I found those flavors too aggressive. In essence this is a simple recipe though – just blend, bake, and assemble. Be warned that the falafel tend to flatten out, though. Ours were somewhat flattened and became much moreso upon baking, though this ended up working well for stuffing into the pita.
Tortilla, delivered, sorta.

Standard

So, in a previous post I mentioned that the partner and I were going to make a tortilla, or Spanish omelette. It took a few weeks to get around to it, but we finally did. And then I went and accidentally deleted the picture. Ay caramba!

Mishap aside, this was a pretty simple and versatile recipe, and I’d recommend it because it works for any meal – breakfast, lunch, or dinner. I’m not sure why breakfast-y food seems the most translatable, why it’s common to have eggs for dinner but not steak for breakfast, for example (especially given that certain breakfast and brunch foods are just as filling and heavy as any dinner food). Anyway, I cobbled the method and ingredients together from a couple different recipes online.

Ingredients:
2 potatoes
1-1.5 onions
5 egg whites, 3 whole eggs – I did this to make the tortilla healthier and because I’m not a fan of the taste of egg yolks. 5 whole eggs would probably also suffice; you’ll need enough to coat the potatoes.
olive oil
salt, pepper, red pepper (optional)
yields 5-6 servings

Directions:
Peel and slice the onion(s) and potatoes and into thin disks; use a mandolin if you have it, otherwise just use a knife and go as thin as you can. Pour a generous amount of oil into a skillet. I didn’t measure this, but you’ll need enough to cover a layer of potatoes.

Heat the oil on med/med-high and drop in potato slices in a single layer. The point is to cook them all the way through, until they break in half with a spatula or wooden spoon. You could probably cook them until lightly browned, though most recipes I came across said to only cook them until tender. Use a slotted spatula to remove potatoes from the oil, and let them rest on a paper towel to get rid of excess oil. Drop in batches of potatoes and the onions until all are cooked. In the meantime, crack and whisk your eggs in a large bowl and season to taste. We used salt, pepper, and red pepper flakes. You could probably also add hot sauce at this point if you want more kick. Add the potatoes/onions to the eggs and mix. Once everything’s coated, pour out most of the oil in your skillet, leaving just enough to coat the pan. Pour in the eggs, potato, and onion, and turn the heat down to medium. Cook for a few minutes, until the egg mixture browns and you can ease the edges away from the pan.

Now comes the slightly tricky part. Use a spatula to loosen as much of the tortilla from the pan as possible, and then put a dinner plate on top of the skillet. Make sure it’s big enough to cover the entire skillet. Then flip the skillet over so that the tortilla slides out onto the plate. Replace the skillet on the stove and slide the tortilla back into the skillet, so that the other side of the eggs can cook. This sounds complicated but it’s not, as long as you let the eggs solidify enough before you flip. You may loose a few potatoes during the process, but food-casualties should be minor. Once this side of the eggs have cooked, you’re ready to go! Slice it like a pie or quiche and eat it morning, noon, or night. 🙂

This was an inexpensive and versatile dish and, as my partner said, it “tastes like childhood.” Even if your mom didn’t make tortillas de patata when you were growing up, we’ve all had eggs and potatoes.

Brownie Cookies and Mom’s Gumbo

Standard

Fotor091710223

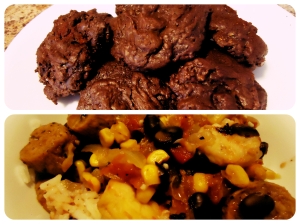
I’ve been in a chocoholic mood lately (more than usual) and what better way to satisfy that craving than with BROWNIE COOKIES??

The other week I found a recipe on The Brown Eyed Baker for Better-than-Brownie Cookies, which are just what they sound like. Or well, I wouldn’t say they’re “better” than brownies unless you for some reason don’t like the brownie’s usual bar form. These brownie cookies are essentially brownies in the shape of cookies, and I’d say they’re as good as brownies, but not necessarily better. The biggest perk might be that they all have a slightly crisp outside and a chewy inside, whereas with actual brownies usually the edges are crispy and the middle is not. The biggest perk with this recipe is also it’s hazard, though! Not sure about you, but it seems more acceptable to me to eat more than one cookie, whereas I’ll rarely have more than one brownie in a sitting. It just feels like too much. The first night I made these though, I had 3-4 cookies, which was way too much sugar. I can handle my sugar, folks. And if they’d been brownies I’d have never been so foolish. But alas, brownies in cookie form seemed more innocuous. Do not be fooled. These are rich, smack-you-in-the-face chocolate.

Here’s the recipe from BEB:
16 ounces bittersweet chocolate, chopped
4 tablespoons unsalted butter, at room temperature
4 eggs
1⅓ cups granulated sugar
1 teaspoon vanilla extract
½ cup all-purpose flour
½ teaspoon baking powder
1 cup semisweet or bittersweet chocolate chips

Directions (modified):
1. Preheat the oven to 350 degrees F. Line two large baking sheets with parchment paper if you have it, but they should turn out fine without it, too.
2. Put the chocolate and butter in a heatproof bowl and set it over a saucepan of barely simmering water, stirring occasionally, until completely melted and smooth.
3. In the meantime, stir together the eggs, vanilla and sugar in a medium bowl. Set aside.
4. In a small bowl, sift together the flour and baking powder.
5. Let the butter and chocolate mixture cool down.
6. Add the melted chocolate mixture to the egg mixture and stir to combine well. Slowly add the dry ingredients, folding them into the batter. Once all of the flour is incorporated, stir in the chocolate chips.
7. Let the dough chill for 40-45 minutes.
8. Scoop 1½ tablespoons of dough (a medium cookie scoop’s worth) onto prepared baking sheets. This is not rollable dough – they’ll be globs, so make sure the cookies are more or less the shape you want them to be.
9. Bake for 12-13 minutes or until they are firm on the outside. Unlike most cookies, they may still be a little wet inside when you take them out. That’s okay, they’ll firm up as they cool.

I didn’t change the ingredients for this recipe, but I did change the cooking directions. Specifically, after reading a lot of the comments on BEB and seeing the trouble many people had with them, I cooled the butter/chocolate mixture before adding other ingredients, chilled the dough a little, and baked them a little longer than the original instructions. The cookies aren’t very pretty (uh oh, I’m noticing a trend with my baking for this site…) but they’re pretty delicious. Just don’t overindulge unless you want a sugar hangover!

But since we can’t live on sugar alone, I also made my mom’s gumbo…which may not really be gumbo, but it’s certainly easy!

Ingredients:

1 package of sausage – whatever strikes your fancy. The partner and I used chicken jalapeno sausage from Trader Joe’s, but my mom usually uses spicy Italian and I bet chorizo would be delish too.
1 large onion
1 can of black beans and 1 can of corn
1 can of rotel tomatoes with green chilies
1 can of diced tomatoes
1 lb shrimp
rice, hot sauce

Directions:
1. Cook the sausage. You can brown them in a pan and pour out the fat, or use the mircrowave, 3-4 minutes on each side. If doing it this way, be sure to surround the sausages with paper towels to eliminate as much fat as possible.
2. In the meantime, dice and saute the onion in a large pot until lightly caramelized.
3. Slice sausage and add to the pot with all the other ingredients, including the shrimp. Shrimp cooks quickly so it’ll cook with everything else and needn’t be prepared ahead of time.
4. Bring everything to a boil and then let simmer for about 20 minutes. We also added a generous amount of hot sauce while everything was cooking, because we like things spicy. But that’s all up to personal preference.
5. Pour over rice (we used basmati) and enjoy! I think it’s traditional to eat gumbo with rice, but if you haven’t got it, crusty bread would probably also work well.

Ambivalent Pumpkin Bread

Standard

Today I made vegan pumpkin bread, adapted from Hell Yeah it’s Vegan! It was both the first time I’ve made a vegan recipe and the first time I’ve used pumpkin as an ingredient. Yay for firsts!

005

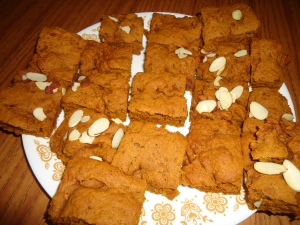
The most significant change I made was to substitute in honey for the original’s maple syrup. I’m not sure how much of an impact this actually had, but the results of this recipe were ambivalent. The bread is very slightly sweet, which is partially why I picked it – in contrast to almost every other recipe I looked up, this called for only 1 cup of sugar instead of 3. It’s also decently moist and has a nice, almost sponge-cake texture. But it isn’t pretty. I don’t have a loaf pan and so had to make do with my normal baking pan. This is fine for the only other bread in my repertoire, banana bread, since that batter is much runnier and even though it’s also technically supposed to be made in a loaf pan, it fills out my baking pan in all the right ways. The pumpkin bread in contrast has a very thick batter, and came out terribly lumpy. I cut most of it into somewhat-aesthetic squares, but I still won’t be serving it to company. In a loaf pan though, it’d be great. I think it would also be good with about 1/2 cup more sugar, but if you’re not in the mood for a sweet bread, it’s good as is. The original recipe calls for walnuts or pumpkin seeds for flourish, of which I had neither. I sprinkled slivered almonds on half of the batter before popping it into the oven instead, and they add a nice bit of crunch. Overall, a decent, if not impressive pumpkin bread.

Ingredients
  • 1 c flour
  • ¾ c whole wheat flour
  • 1 c dark brown sugar
  • 1 tsp baking soda
  • ½ tsp baking powder
  • ½ tsp salt, nutmeg, cinammon, allspice, cloves
  • 1 c pumpkin purée
  • ½ c oil
  • 3 Tbsp honey
  • 3 Tbsp water
  • almonds (or walnuts, pumpkin seeds, etc)
Instructions
  1. Preheat oven to 350°F.
  2. Spray a loaf pan w/ non-stick spray such as Pam. (Really, use a loaf pan!)
  3. In a large bowl, mix together flours, sugar, soda, baking powder, salt, and spices.
  4. In a small bowl, whisk together pumpkin, oil, syrup, and water.
  5. Add wet mixture to dry; combine until just moistened. The batter will be very thick; don’t worry!
  6. Pour into prepared pan and bake 45 minutes in a loaf pan or, if you only have a baking pan like me, 25 minutes until top is browned and a toothpick inserted in the center comes out clean.

Penne with Garlicy Kale and Feta

Standard

Image

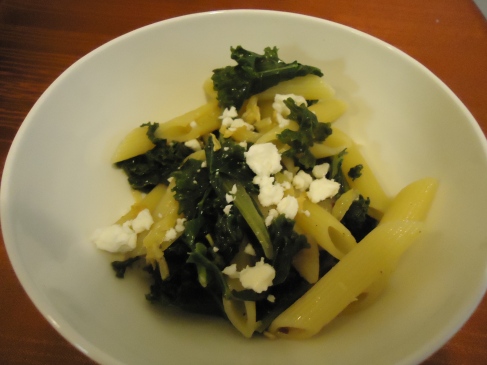
So, this week’s cooking experiment was pasta with sauteed kale, adapted from Smitten Kitchen. That recipe calls for swiss chard and spaghetti; I used kale and penne. Not because I’ve got anything against swiss chard and spaghetti, but my grocery store apparently did. Not a sign of swiss chard anywhere! And penne was in my pantry, so, 2+2.

I cook pasta rather infrequently despite the fact that it’s versatile and inexpensive. It always tends to take longer to boil than I expect, and though I have no problem with large knives, hot ovens, spitting oil, or other potential kitchen hazards, something about boiling water makes me antsy. But I’m determined to tackle it this year – practice makes perfect (better) – after all. So today was a pasta day.

Ingredients:

1/3 cup olive oil
3/4-1lb penne
1 large bunch of kale, roughly chopped (~1lb)
1 head of garlic
1 medium red onion, finely chopped
1/2 cup water
1/2 cup crumbled feta
salt, black pepper, red pepper to taste

Pour olive oil into a large skillet and heat on medium. Chop garlic lengthwise, or crosswise, whichever is easier. (Leave them large enough that you’ll be able to get them out of the oil with a slotted spoon or spatula.) Add the garlic to the olive oil and cook for 3-4 minutes until the garlic softens and becomes golden. Scoop out onto a paper towel with aforementioned spoon or spatula and add the onion to the oil. Cook until it becomes soft and translucent, about 6 minutes on medium heat. Add the kale (I included the stems, cut lengthwise), and salt, pepper, and red pepper to the onions/oil. Add water and cook, covered, until the kale wilts. This will take 10-15 minutes on med-high as kale is a pretty sturdy green and can stand up to a lot of cooking.

In the meantime, cook the pasta in boiling water with a splash of olive oil to keep it from sticking together. Once the pasta’s al dente, the kale should also be nicely wilted and you should add the pasta to the pot with the kale. You can also add 1/2 cup of pasta water but it’s not necessary. Mix, top with feta, and enjoy! (If you’re a garliphile like me, you can also add some of the garlic from earlier. But it was the cool, salty bite of the feta made this dish. It both contrasted with and complimented the red pepper and garlic. Delish!)

This still took me longer than I expect pasta dishes to take. Having made this on a summer night though, without schoolwork pending, I think a timesaver would be to simply smash the garlic and let it simmer in the olive oil during the first step. The oil should still become infused with garlic, which is the point. So perhaps I’ll try that next time. I may also be under some sort of self-imposed misconception about how quickly (or not) pasta cooks. Only practice, practice, practice will tell.

You say tortilla, I say London!

Standard

Image

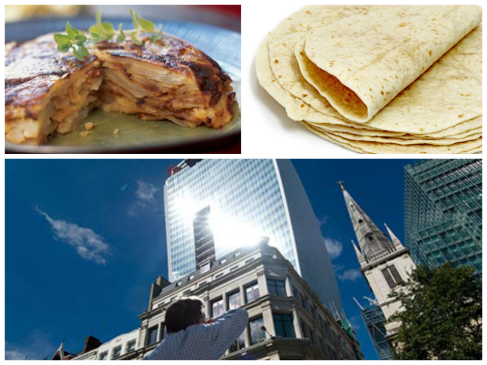
So, my partner suggested to me yesterday that we make a tortilla. At first I thought he meant the external part of a taco (which by definition means both the corn or wheat tortilla and its filling) but he was actually short-handing the tortilla espanola, or Spanish omelette. (Anyone know the etymology of this culinary split?) It’s one of the most common tapas in Spain and seems ridiculously easy, even to a novice like me. Who doesn’t like egg and potatoes?

In other news, the blog io9 recently featured an article about a skyscraper under construction at 20 Fenchurch Street in London that can fry both cars and eggs. Colloquially called the “Walkie Talkie building,” its curved surface acts like a gigantic solar panel-cum-magnifying glass for a few hours of the day and has, according to the British press, melted part of a Jaguar. Gives several new senses to the warning “Look out below!”

We can’t all fry our eggs in the streets of London, though. For this tortilla recipe, a pan will have to do. Pictures to come!